
The Flow Builder is a powerful tool for Admins; it allows us to build user journeys that look great and execute complex business logic at Lightning speed.
When you use flows in your org, the chances are there’s going to be bumps along the road and your flows are not always going to do what they were designed to do.
There are 100s of different ways you can make your flow throw an error, so you can get creative! From trying to create records without required fields, to breaking flow limits.
In this blog, we won’t cover how to avoid the errors in the first place. We are going to look at how we can handle those Flow errors in the best way possible.
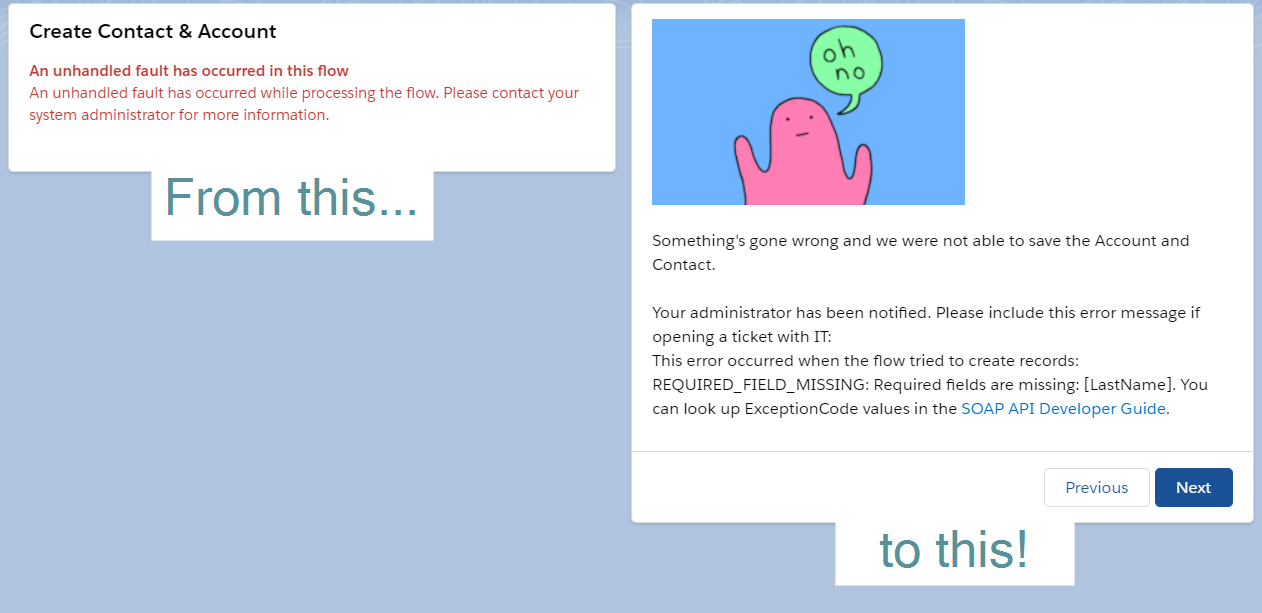
Most users of flow will be familiar with this picture:
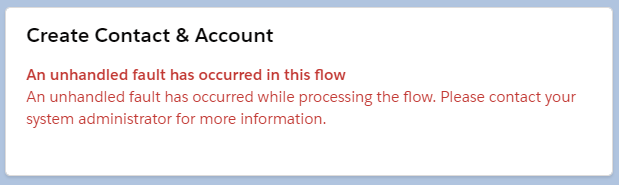
It isn’t a very pretty error message and it still makes my blood run cold. I used to imagine what the end-user must think when they see this message:
Have I broken something? Is Salesforce broken? Did any actions take place?
At best it’s inconvenient and at worst it makes you as an Admin look unprofessional and erodes confidence in the system.
If I expected most readers to have seen the ‘Unhandled Fault’ message, I wonder how many of you have seen ‘Fault Connectors’ which Salesforce provides to handle Flow errors?

I work on many Salesforce Orgs and I rarely see these used. They are recommended as best practice and using them can make flows failing a lot less stressful.
You can use the fault connector from any of the ‘data’ elements (the pink ones), or the Action elements in the Flow toolbox.
To create a fault connector, simply create a second connection from your element after creating your first connection.
We now know how to create a fault connection, but what do we attach it to? Below is a simple screen flow which lets users create a Contact and Account at the same time. We will use this to demonstrate some of the best elements to use after things have gone wrong.
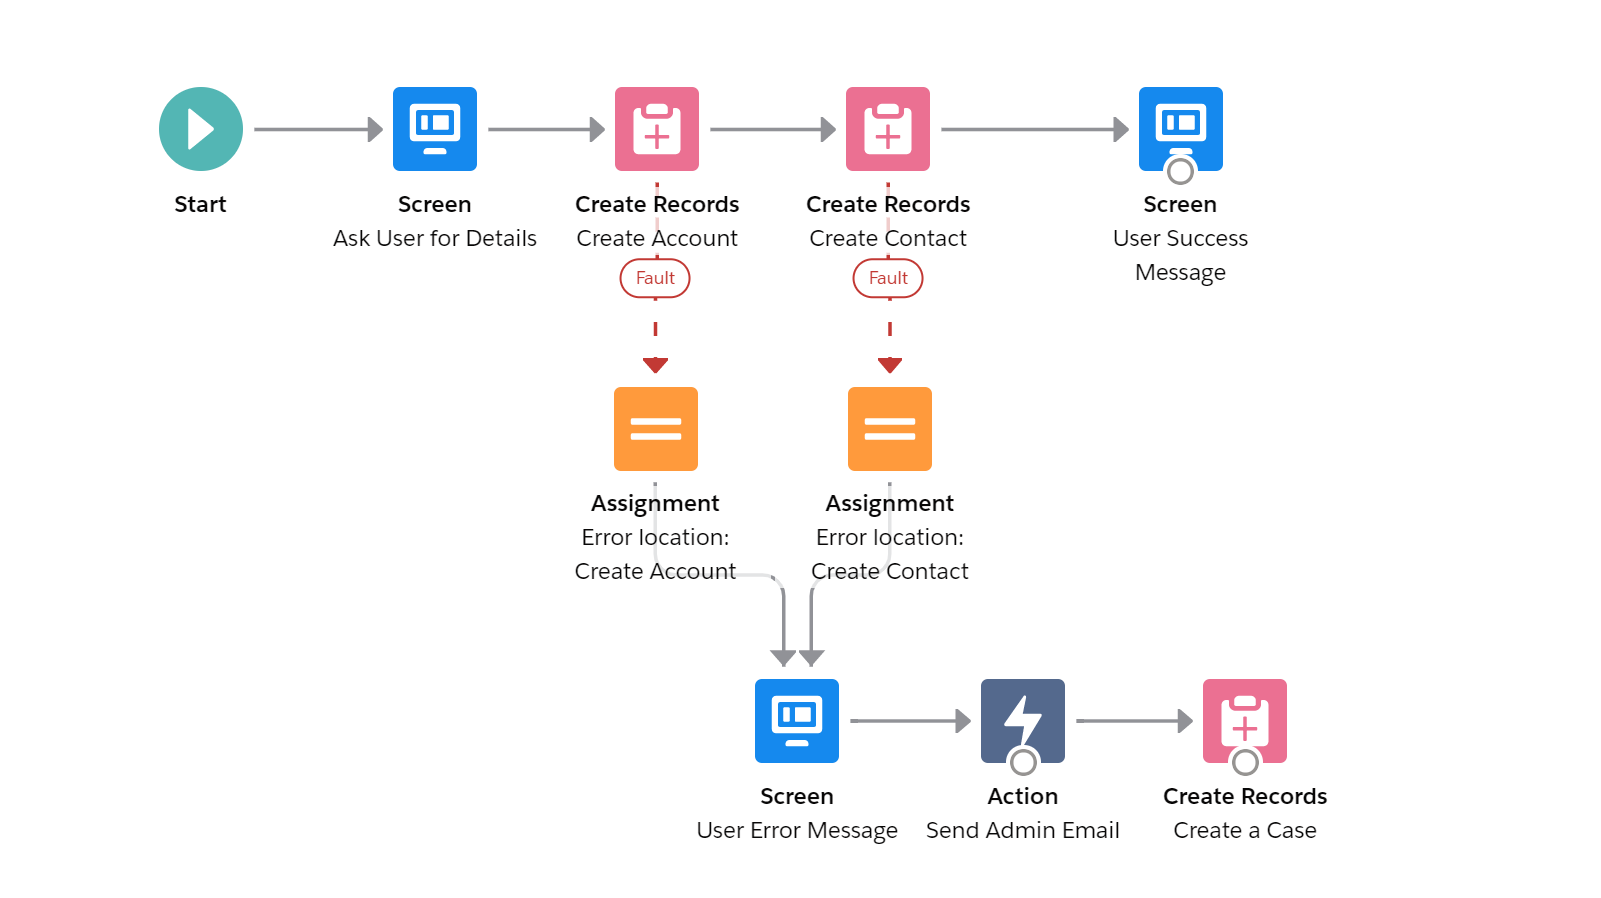
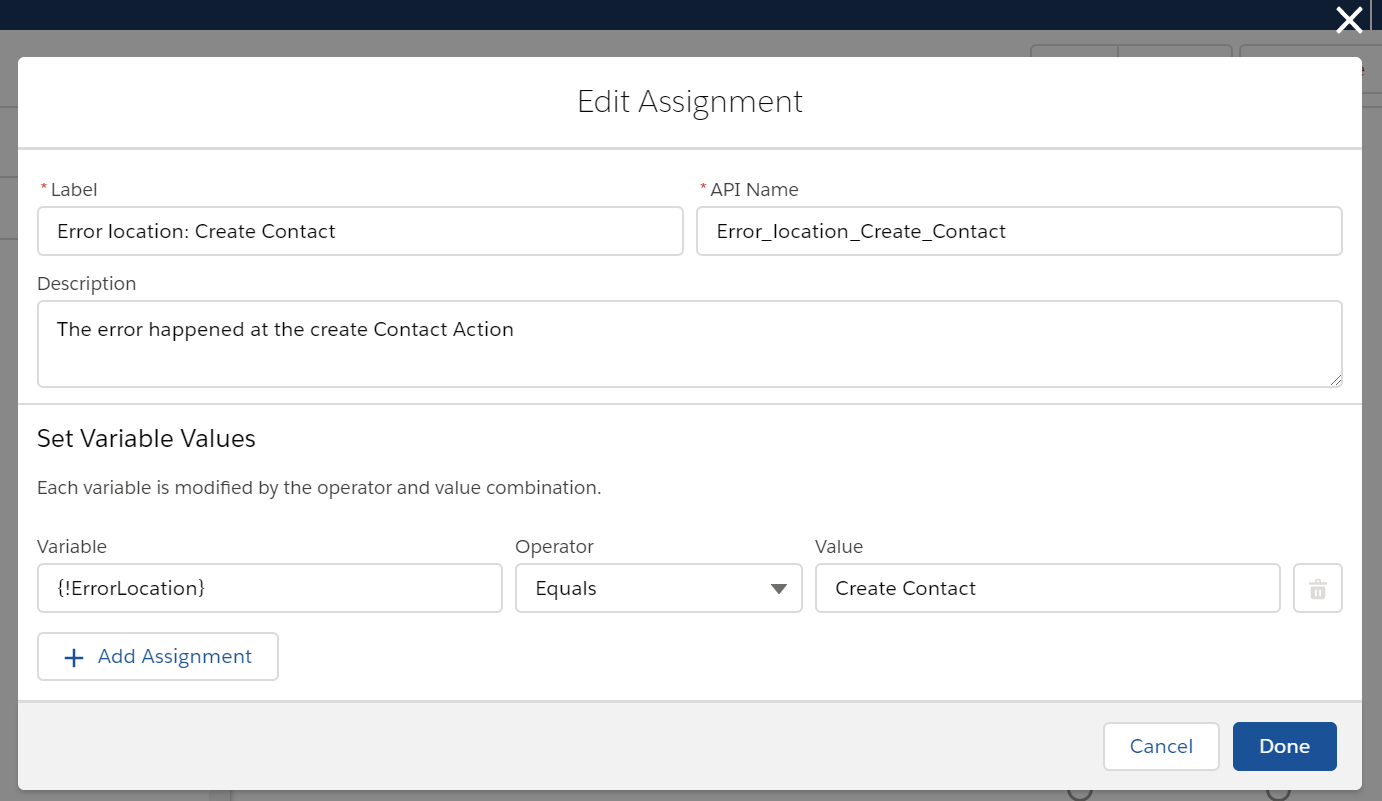
First things first – use an assignment element to record exactly where the flow went wrong. I usually assign a value to a text variable called ‘Error location’. Spoiler alert… we’ll be using this later.
Never see that awful red ‘Unhandled Fault’ message in your screen flows again! Use a Screen element and Display Text to communicate with the user. You can even add images and merge fields such as {!$Flow.FaultMessage}. With this fault message, the user might even be able to see what is wrong themselves.
Note: This can only be done in screen flows. Flows which are auto-launched from a Process Builder, for example, will show an error message on the screen where you are triggering the flow.
The standard error email received when a flow breaks can be quite difficult to decipher. So why don’t we make our own?
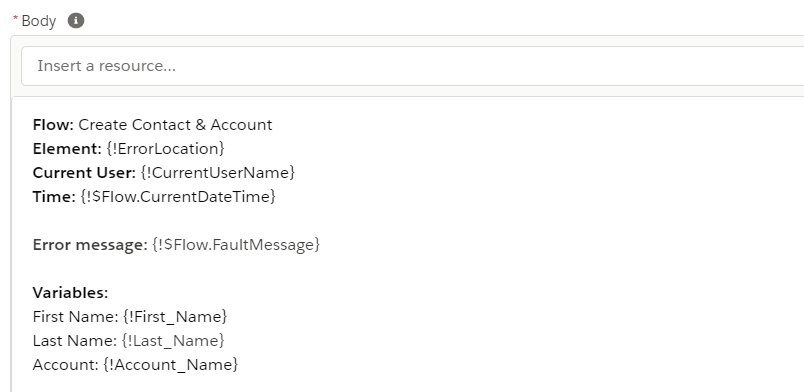
We can curate a personalised email alert to Admins of the org to let them know that the Flow has gone wrong, and we can even use the {!ErrorLocation} variable from before to tell them exactly where it’s fallen over.
I create a ‘Text Template’ resource and use that for the body of a ‘Send Email’ core action. You could even send an email to the running user to put their mind at rest too.
If your IT team uses Salesforce Cases to manage requests, then why not cut out the intermediaries and create it straight away with a Create Record element? You can use the merge fields we have seen along the way to populate the Subject, Description and other fields.
Using fault connectors to handle errors in your flows will improve your users’ experience and help deliver the information that Admins need to understand problems with Flows quickly. That new screen flow error message looks so nice… I secretly hope I see it again soon!
Now you know how to handle Flow errors, it might be worth bundling up the actions in a subflow so you can call them again and again. This free AppExchange product from Salesforce Labs gives you a big head start on doing this by giving you a subflow with some email actions which you can call with your fault connector.
For the full detail on Flow errors, see the Salesforce Documentation